
Here’s a quick how-to for setting up a Pihole server at home.
First, you need to setup a VM/raspberrypi to host the Pihole. I decided to just run Pihole off a VM on my ESXi server I already had.
The VM I’m using is a Ubuntu 18.04 LTS Server image. To get it to work with Pihole we’ll have to make the IP static so it doesn’t up and change on us.
Since Ubuntu 17(?), Ubuntu uses netplan for configuring it’s ethernet interfaces. So let’s go to its config file at /etc/netplan/50-cloud.yaml (alternatively create a file called 01-netcfg.yaml and remove the default files). Edit the text so it looks like this:
network:
  version: 2
  renderer: networkd
  ethernets:
    ens160:
      dhcp4: no
      addresses:
        - 192.168.1.100/24
      gateway4: 192.168.1.1
      nameservers:
        addresses: [192.168.1.1]
Be wary that your ethernet interface name/ip subnet may vary, mine is ens160. Also, set your address to whatever you like, but I’ll be using 192.168.1.100. Once you’re done, run
~ sudo netplan apply
Now to install Pihole. Simply run:
~ curl -sSL https://install.pi-hole.net | bash
It will prompt you for a few options like what external DNS you’d like to use, OpenDNS, Quad9, and DNSWatch are all fine. Once it’s finished it will show a screen with a randomly generated password to access the Pihole admin menu.
Next, login at http://192.168.1.100/admin/ using the password provided. Now you have your very own DNS server.
There’s a few quality of life improvements I recommend:
First, lets add some more blocklists. Click Tools > blocklists. Then copy and paste this into the text block:
https://raw.githubusercontent.com/StevenBlack/hosts/master/hosts
https://mirror1.malwaredomains.com/files/justdomains
http://sysctl.org/cameleon/hosts
https://s3.amazonaws.com/lists.disconnect.me/simple_tracking.txt
https://s3.amazonaws.com/lists.disconnect.me/simple_ad.txt
https://hosts-file.net/ad_servers.txt
https://raw.githubusercontent.com/nicholasb2101/PiHole/master/Blocklists/Primary%20Blocklist.txt
https://raw.githubusercontent.com/nicholasb2101/PiHole/master/Blocklists/Secondary%20Blocklist.txt
Click save and update, it may take a minute.
To setup your router to use your Pihole you’ll need to set it’s default DNS to use 192.168.1.100. Once that is done you can set all device’s DNS to your router at 192.168.1.1 and it’ll route to the Pi. If your using, OpenWRT you can do this by selecting Network > Interfaces > Edit Lan; Then enter 6,192.168.1.100 into the DHCP-Option field.

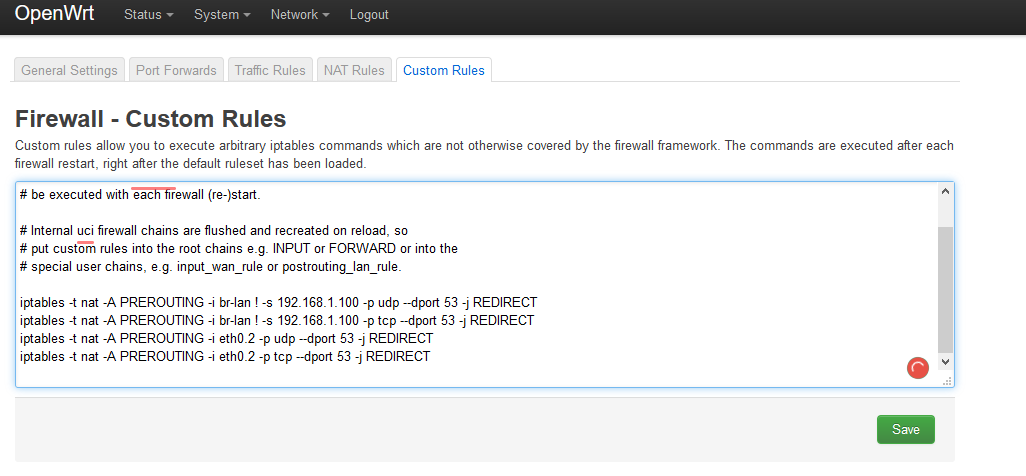
To force devices that are hardcoded to use external DNS you can configure your router to redirect all DNS requests to your Pihole. If you end up setting up a OpenWRT router, log in to it, then click Network > Firewall > Custom rules and drop these commands into the text box. If don’t have OpenWRT but can ssh into your router, then ssh into your router and enter these commands.
iptables -t nat -A PREROUTING -s 192.168.1.1 -j ACCEPT
iptables -t nat -A PREROUTING -d 192.168.1.100 -j ACCEPT
iptables -t nat -A OUTPUT -p udp --dport 53 -j DNAT --to 192.168.1.100
iptables -t nat -A OUTPUT -p tcp --dport 53 -j DNAT --to 192.168.1.100
That’s all the configurations I’ve made to my Pihole so far, and I’m immensely satisfied.
Fin.