
This was pesky enough that I thought it merited a small post. I recently ran out of media on my Ubuntu VM on my ESXi v6.5 homelab. And went on a small adventure trying to figure out what to slap in the terminal to get more space. So hopefully this might save someone else more time.
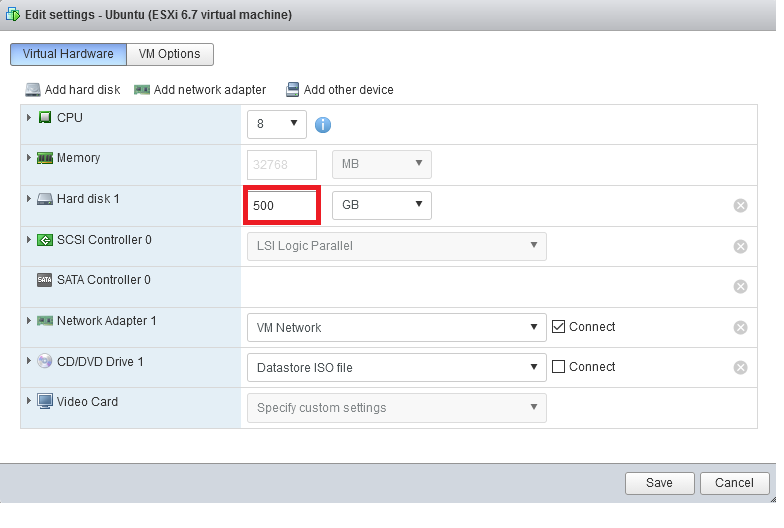
First, go to the VM whose HDD you’d like to expand and click edit settings. Then click the Hard disk option and enter your desired HDD size (make sure the VM is shut down for this).
Then boot your VM and click the GUI option or ssh in. Make sure GParted is installed with:
~ sudo apt install gparted
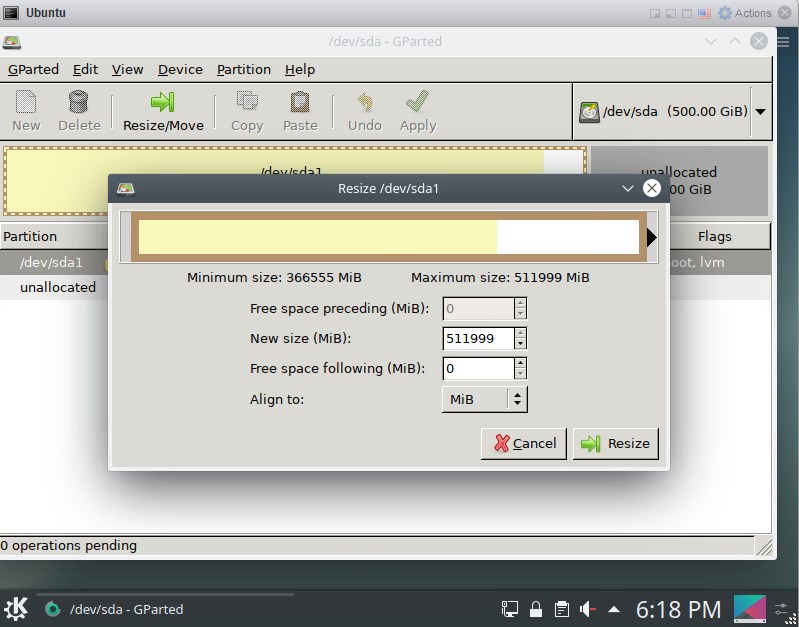
Start GParted and click the /dev/sda1 partition then click the Resize/Move button. Drag the partition to the right to consume the unallocated partition.
Normally, this is all you’d have to do for a regular linux machine, however, it uses logical volumes that have to be extended as well.
Run
~ sudo fdisk -l
It should display something like this:
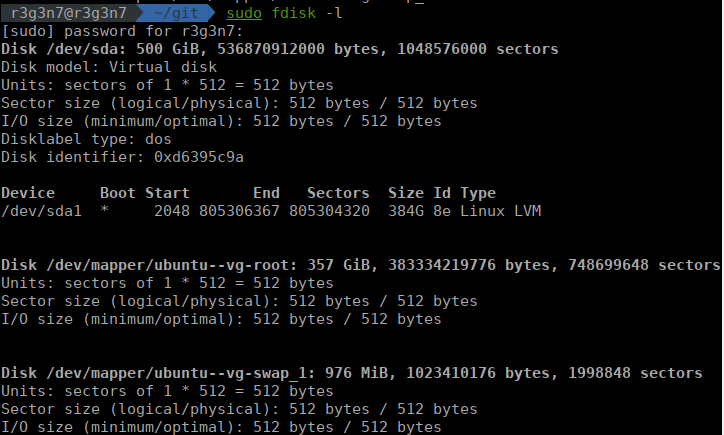
The second entry, ubuntu–vg-root, is the volume we’re concerned with. The name will vary from machine to machine but it should still something like name–vg-root at end. You can ignore the swap partition.
Next run:
~ sudo lvresize /dev/mapper/ubuntu--vg-root -L +100g
~ sudo resize2fs /dev/mapper/vg0-slash
Be sure to modify /dev/mapper/ubuntu–vg-root to match your fdisk -l output. This extends your partition by 100g, insert however much you need. You can use 100%FREE instead of +100g and it should consume all available space; however, I couldn’t get it working for me.
That’s it!